When it comes to data visualization in Python, Matplotlib is one of the most popular libraries out there. It offers a wide range of tools and features to create stunning graphs and charts with ease. One of the useful functionalities of Matplotlib is the ability to create a box around text, which can help highlight important information or text labels in your plot.
If you’re wondering how to create a box around text in Matplotlib, then you’ve come to the right place. In this article, we’ll guide you through the process of adding box annotations to your plot using Matplotlib’s text and annotation functions. We’ll cover everything from basic box styling to more advanced customization options so that you can make your boxes stand out on your plot.
Whether you’re a beginner or an experienced data analyst, learning how to create a box around text in Matplotlib is a useful skill to have in your toolkit. So, let’s get started and explore the various ways you can make use of this feature to make your visualizations more appealing and informative. By the end of this article, you’ll be able to create beautiful box annotations around your text that are sure to catch your audience’s attention.
“Box Around Text In Matplotlib” ~ bbaz
Introduction
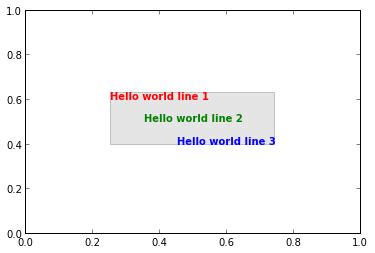
When working with data visualization in Python, the Matplotlib library is often the go-to choice for its versatility and ease of use. One feature that may come in handy when adding annotations to your visualizations is creating a box around text. This can help draw attention to important information or provide context for the data being displayed. In this article, we will explore two ways of achieving this effect: using the annotate() function and using the bbox argument in text(). We will compare and contrast each approach to help you decide which one best suits your needs.
Using annotate()
The annotate() function in Matplotlib allows you to add annotations to your plot in various ways. One of these is by specifying the location and text to annotate, as well as some optional parameters such as font size and color. We can also use the bbox argument to create a box around our text. Here is an example:
# import pyplot moduleimport matplotlib.pyplot as plt# create plotx = [1, 2, 3, 4, 5]y = [10, 8, 6, 4, 2]plt.plot(x, y)# add annotation with boxplt.annotate('Important info', xy=(2, 8), xytext=(3, 9), fontsize=12, color='red', bbox=dict(facecolor='white', edgecolor='black', boxstyle='round'))# show plotplt.show()Explanation:
We first import the pyplot module and create a simple line plot. We then use annotate() to add an annotation at position (2, 8) with the text Important info. The xytext argument specifies where the text should be placed relative to the annotation position. We also set the font size and color of the text. The bbox argument is a dictionary that specifies the box properties, including its face color, edge color, and style (in this case, a rounded rectangle).
Pros:
- Can customize box style and colors
- Allows for precise positioning of text
- Works well with annotations involving arrows or lines
Cons:
- Requires extra parameters for box styling
- Can clutter the code if used extensively
- Box size is static and may not fit all text
Using bbox in text()
An alternative way of creating a box around text in Matplotlib is to use the bbox argument in the text() function. This allows us to add text directly to the plot without the need for annotations. Here is an example:
# import pyplot moduleimport matplotlib.pyplot as plt# create plotx = [1, 2, 3, 4, 5]y = [10, 8, 6, 4, 2]plt.plot(x, y)# add text with boxplt.text(3, 6, 'Important info', fontsize=12, color='red', bbox=dict(facecolor='white', edgecolor='black', boxstyle='round'))# show plotplt.show()Explanation:
We first import the pyplot module and create a simple line plot. We then use text() to add text at coordinates (3, 6) with the text Important info. We set the font size and color of the text, and use the bbox argument to create a box around it. The parameters for the box are the same as in the previous example.
Pros:
- Does not require annotations
- Can be more concise than using annotations
- Box size can adjust dynamically to fit text
Cons:
- May require adjustment of text position for optimal alignment with data
- Box style and colors cannot be customized as extensively as with annotations
Comparison Table
| Method | Pros | Cons |
|---|---|---|
| annotate() |
|
|
| text() with bbox |
|
|
Conclusion
When it comes to creating a box around text in Matplotlib, both the annotate() and text() with bbox approaches have their strengths and weaknesses. If you need precise positioning of text or are using annotations involving arrows or lines, annotate() may be the better choice. On the other hand, if you want more concise code or need the box to adjust dynamically to fit text, text() with bbox may be the way to go. Ultimately, the best approach will depend on your specific needs and preferences, so feel free to experiment with both methods to see which one works best for you.
Thank you for taking the time to explore the topic of creating a box around text in Matplotlib with us. We hope that this article has provided you with valuable insights and useful tips that you can use to enhance your data visualization projects.
As you now know, creating a box around text in Matplotlib is a simple and effective way to draw attention to specific areas of your graphs or charts. By using the right combination of formatting options and visual elements, you can make even the most complex data sets more engaging and easier to interpret.
We encourage you to experiment with different approaches to creating boxes around text in Matplotlib and to explore the many other features and capabilities offered by this powerful data visualization library. With practice and experience, you will be able to create stunning visualizations that communicate insights and information in compelling and impactful ways!
When it comes to creating a box around text in Matplotlib, there are some common questions that people tend to ask. Here are some of the most frequently asked questions:
1. Can I create a box around only certain parts of my plot?Yes, you can! In Matplotlib, you can use the ax.annotate() function to add text annotations with boxes around them. This function allows you to specify the location of the annotation and the text to be displayed, among other things. To create a box around only certain parts of your plot, you just need to specify the text that you want to include in the annotation.2. How do I change the style of the box?Matplotlib provides several options for customizing the style of the box around your text. For example, you can change the color and transparency of the box using the edgecolor and alpha parameters, respectively. You can also adjust the border width of the box using the linewidth parameter. Additionally, you can change the style of the box by specifying a different value for the linestyle parameter.3. Can I add a title to the box?Yes, you can add a title to the box by including it as part of the text string that you pass to the ax.annotate() function. For example, you could include a title like Important Note at the beginning of the text string, followed by the actual content of the note.4. Is it possible to create a box that spans multiple lines?Yes, you can create a box that spans multiple lines by using the newline character (\n) to separate the lines in your text string. When you pass this string to the ax.annotate() function, Matplotlib will automatically wrap the text and create a box that extends to cover all of the lines.


