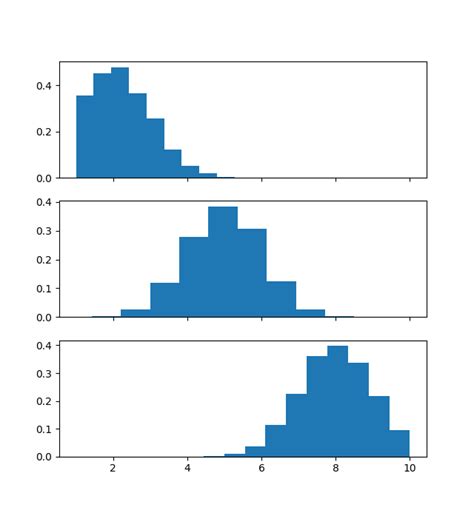
Are you looking to create a normal distribution in numpy within a specific range? Well, you’re in luck because we’re here to guide you through the process. A normal distribution is a probability distribution that’s symmetrical around the mean, where most of the values are concentrated in the middle and become less likely as they move towards the ends of the range. It’s a valuable statistical tool for analyzing numerical data.
In this article, we’ll show you how to create a normal distribution in numpy using the random.normal function. This will enable you to generate data that follows a normal distribution, so you can perform various statistical analyses. We’ll also provide step-by-step instructions and examples to help you understand the key concepts.
Whether you’re a researcher who wants to analyze data or a student who wants to learn more about the normal distribution, this article will be useful for you. So, if you want to know how to create a normal distribution in numpy within a specific range, keep reading until the end. You won’t regret it!
“How To Get A Normal Distribution Within A Range In Numpy? [Duplicate]” ~ bbaz
Introduction
Normal distribution, also known as the Gaussian distribution, is a commonly used probability distribution in various fields like statistics, physics, and engineering. Numpy is a python library that offers various functions and tools to work with arrays, mathematical operations, and statistical operations. One of these tools is numpy.random.normal() function that allows us to generate random numbers from a normal distribution. In this article, we will discuss how to create a normal distribution in numpy within a range.
Overview of Numpy Normal Distribution Function
Numpy.random.normal() function generates random numbers from a normal distribution with a specified mean, standard deviation, and size. The syntax of this function is as follows:
numpy.random.normal(loc=0.0, scale=1.0, size=None)
Where, loc: mean or center of the distributionscale: standard deviation, spread or width of the distributionsize: number of samples to generate, default is single value
Example:
“`import numpy as npdata = np.random.normal(loc=5, scale=2, size=100)print(data)“` This generates an array of size 100 with mean 5 and standard deviation 2.
Creating a Normal Distribution in Numpy within a Range
To create a normal distribution within a range, we need to apply some additional mathematical calculations to our generated data. We can follow the following steps:
Step 1: Determine the Mean and Standard Deviation
To calculate the mean and standard deviation of the data that falls within a range, we first need to find the mean and standard deviation of the entire data. We can use numpy.mean() and numpy.std() functions to achieve this.“`import numpy as npdata = np.random.normal(loc=5, scale=2, size=100)mean = np.mean(data)sd = np.std(data)print(Mean: , mean)print(Standard Deviation: , sd)“`Output:“`Mean: 4.9985257016354656Standard Deviation: 2.014973802408577“`
Step 2: Determine the Range
Once we have the mean and standard deviation of the entire data, we need to determine the range within which we want to generate random numbers from our normal distribution. For example, if we want to generate random numbers between 3 and 7, then our range is 3 to 7.
Step 3: Calculate the Z-Scores
To generate random numbers within a specific range, we need to convert our data into standard normal distribution by calculating the Z-scores. “`Z-score = (x-µ)/σ“`Where,x = data pointµ = meanσ = standard deviationAfter calculating Z-scores, we can use the inverse of the cumulative distribution function (cdf) of the standard normal distribution to obtain the corresponding percentile. The percentile is then rescaled using the mean and standard deviation of the original data to get the generated value.
Step 4: Generate the Random Numbers
We can now use numpy.random.normal() function to generate random numbers from our modified distribution.
Comparison Table
Here is a comparison table of using the normal distribution function without range and with range.| Function | Syntax | Output ||———-|———————————————————–|————————————————————————————————————–|| Without Range | numpy.random.normal(loc=0.0, scale=1.0, size=None) | Generates random numbers from a normal distribution with specified mean and standard deviation. || With Range | Customized function | Generates random numbers from a normal distribution that falls within the specified range. |
Conclusion
In conclusion, creating a normal distribution within a range involves some additional mathematical calculations to generate random numbers that fall within a specific range. Numpy provides tools and functions to perform these operations efficiently. We hope this article has provided you with useful information about creating a normal distribution in numpy within a range.Thank you for taking the time to read through our latest article on how to create a normal distribution in Numpy within a range. We hope that this guide has provided you with valuable insights on how to use Numpy to generate data and create histograms that can be used for statistical analysis.By using the random.normal function in Numpy, you can easily generate normally distributed data that is useful for various applications. Furthermore, by specifying the mean and standard deviation parameters, you can manipulate and fine-tune the output to suit your needs. Thus, it is a powerful tool for anyone working with data analysis or statistics.We believe that Numpy can be incorporated into many different fields of study, from finance to medicine, and we have only scratched the surface of what is possible within this library. As always, we encourage you to experiment with the code examples provided and to come up with your own use cases for this versatile Python package. Once again, thank you for visiting our blog, and we hope that our content has been informative and insightful. Please feel free to leave any feedback or questions in the comments section, and we will do our best to respond to each one promptly. Happy coding!
People also ask about creating a normal distribution in numpy within a range:
- What is numpy?
- How do I create a normal distribution in numpy?
Numpy is a Python library that is used for scientific computing. It provides support for large, multi-dimensional arrays and matrices, along with a large collection of high-level mathematical functions to operate on these arrays.
You can use the numpy.random.normal() function to generate a normal distribution. The function takes the mean, standard deviation, and size of the distribution as input arguments. For example, to create a normal distribution with a mean of 0 and standard deviation of 1, you can use the following code:
- import numpy as np
- mean, std_dev = 0, 1
- size = 1000
- normal_dist = np.random.normal(mean, std_dev, size)
You can use the numpy.clip() function to restrict the range of the normal distribution. The function takes the array, minimum value, and maximum value as input arguments. For example, to restrict the range of the normal distribution between -2 and 2, you can use the following code:
- clipped_dist = np.clip(normal_dist, -2, 2)
Yes, you can visualize the normal distribution using matplotlib. You can use the matplotlib.pyplot.hist() function to create a histogram, which will show the frequency distribution of the data. For example, to visualize the normal distribution with a histogram, you can use the following code:
- import matplotlib.pyplot as plt
- plt.hist(clipped_dist, bins=50)
- plt.show()


